How to Install TWRP Recovery on Samsung Galaxy J7 Prime
So Do you want to Install TWRP Recovery on Samsung Galaxy J7 Prime? If yes then you are at right place. Today we are here with a Guide on How to Install TWRP Recovery on Samsung Galaxy J7 Prime.
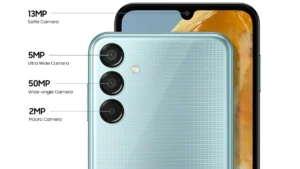
Samsung Galaxy J7 Prime is Budget Device From Samsung. Galaxy J7 Prime has 5.5-inch Display with Corning Gorilla Glass protection. The Galaxy J7 Prime Comes with a 13MP Camera on Rear and 8MP on Front for Selfie. The Samsung Galaxy J7 Prime is running on Android Marshmallow. It has 3300mAh Battery.
So in this guide, we will tell you How to Install TWRP Recovery Samsung Galaxy J7 Prime. but before we starting the process there are some points and Pre-requirements you have to follow make sure you follow all of them carefully.
Also Read:- How to Root Samsung Galaxy J7 Prime.
Pre-Requirements
- This method is only for Samsung Galaxy J7 Prime.
- Make Sure there is more than 75% battery in your Android Device.
- You need PC for Install TWRP Recovery.
- RootUpdate is Not Responsible for any damage to your smartphone.
Download
TWRP Recovery:-Download
ADB Driver:-Download
Odin Tool:- Download
Enable OEM Unlocking and USB Debugging
Enable OEM unlocking and USB debugging. to do this, Go to Setting –> About Phone–> Software info and tap 7 times on Build Number to enable Developer option. Go back and you will see Developer Option Tap on it and Enable OEM unlocking and USB Debugging.
How to Install TWRP Recovery Samsung Galaxy J7 Prime
Step 1. Download the TWRP Recovery.tar from the Download Section.
Step 2. Download and Install Odin Tool on PC / Laptop Whatever You have. and Make sure ADB Drivers are Installed on Your Computer.
Step 3. Boot Your Samsung Phone into Download Mode. Turn off your Phone completely, Then Press Volume Down + Home Button + Power Button.
Step 4. Now open Odin Tool with elevated privileges.. to do this, right click on Odin tool and select run as administrator.
Step 5. Now connect your Samsung Galaxy J7 Prime to PC Via USB cable.
Step 6. In Odin Tool You will see Added!! when your device is detected.
Step 7. Now click on AP option and choose the TWRP Recovery.tar.
Step 8. To start the process You have to click on Start Button in Odin Tool.
Step 9. So When the installation process is done. you will see PASS with Green Tab in Odin Tool.
Step 10.Disconnect you Android Phone from the desktop. and Reboot it.
That’s all!!! Now you have successfully Installed TWRP Recovery on Samsung J7 Prime.
i Hope you liked our Guide on How to Install TWRP Recovery on Samsung Galaxy J7 Prime. If you have any doubt feel free to leave a comment down below in comment section.