fix Windows 11 context menu crashes explorer: Windows 11 has been out for a while now, and with it came a new context menu. However, some users have been reporting that the new context menu crashes Explorer. If you’re one of those users, don’t worry; there is a fix. In this blog post, we will show you how to fix the issue so that you can get back to using your computer without any issues. We will also provide some troubleshooting tips in case the issue persists.
What is the context menu?
Table of Contents

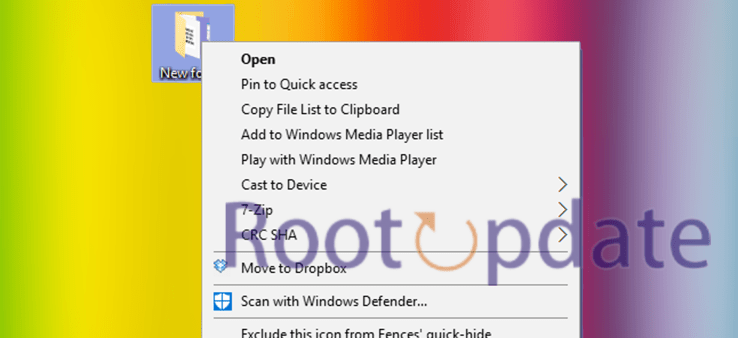
The context menu is the menu that appears when you right-click on an object in Windows 11. It allows you to perform various actions on the object, such as opening it, copying it, or deleting it.
Sometimes, the context menu can crash Explorer, the program that provides the menus for Windows 11. This can be annoying and frustrating, but there are a few things you can do to fix it.
First, try restarting your computer. This will often fix the problem, as it will reset all of the programs that are running on your computer.
If that doesn’t work, try running a virus scan. Sometimes, malware can cause the context menu to crash Explorer. Running a virus scan with your anti-virus software should remove any malicious software that is causing the problem.
Finally, if neither of those solutions works, you can try reinstalling Windows 11. This will give you a fresh start and hopefully fix any problems that were causing the context menu to crash Explorer.
How to open the context menu

To open the context menu, right-click on the desktop or an empty area of the taskbar. You can also use the keyboard shortcut Windows key+X. If you are using a touchscreen, you can open the context menu by pressing and holding down on an item until the contextual choices appear.
What to do if the context menu crashes explorer
If you find that your context menu is crashing explorer, there are a few things you can do to try and fix the issue.
First, try restarting your computer. This November resolve the issue if it is simply a temporary glitch.
If restarting does not work, try uninstalling any recently installed programs. One of these programs could be causing the crash.
You can also try running a virus scan to see if there are any malicious files on your system causing the issue.
If you still cannot fix the problem, you November need to reinstall Windows 11. This should be a last resort, as it will delete all of your files and settings.
Why does Windows 11 crash when I right click?
There are a few reasons why your Windows 11 Explorer might crash when you right click on your desktop or in a folder. One possibility is that there is a problem with the ContextMenuHandlers registry key. This key tells Windows 11 what programs should handle what types of files when you right-click them. If this key is corrupt, it can cause Windows 11 Explorer to crash.
Another possibility is that you have a corrupted system file. System files are crucial to the proper functioning of your computer, and if one is corrupted it can cause all sorts of problems – including crashes when you right-click.
If you’re not sure what’s causing your Windows 11 Explorer crashes, it’s best to run a scan with a reliable anti-malware program. This will scan your computer for any potential threats and help you remove them if necessary.
Crash in Windows 11 Build 22563
If you’re experiencing crashes in Windows 11 Build 22563, there are a few things you can try to fix the issue.
First, try restarting your computer. If that doesn’t work, try resetting your PC to a previous build. To do this, go to Settings > Update & Security > Recovery. Under “Go back to an earlier build”, click Get started.
If you’re still experiencing crashes, it’s possible that the issue is with a specific app or extension. Try disabling or uninstalling any suspicious apps or extensions and see if that fixes the issue.
If you’re still having trouble, contact Microsoft support for more help.
How to fix Windows 11 context menu crashes explorer
If you’re experiencing crashes in Explorer when trying to open the context menu, there are a few potential fixes you can try.
First, try restarting your computer. This November resolve the issue if it’s a transient problem.
If that doesn’t work, try resetting the Windows 11 Context Menu by deleting the following Registry key:
HKEY_CURRENT_USER\Software\Microsoft\Windows 11\CurrentVersion\Explorer\Discardable\PostSetup\ShellNew
Be sure to back up the Registry key before deleting it, just in case. Once it’s been deleted, restart Explorer and see if the context menu now works correctly.
If you’re still having issues, you can try reinstalling Explorer. To do this, open an Administrator Command Prompt and type the following command:
sfc /scannow
This will scan for corrupt system files and replace them as needed. Once the scan is complete, reboot your computer and see if the context menu problem has been resolved.
Clear File Explorer Cache

When you open File Explorer, Windows 11 keeps a cache of thumbnail images and icons for all the files and folders you have accessed recently. This helps File Explorer load faster the next time you open it. However, over time this cache can become outdated or corrupted, which can cause File Explorer to crash.
To clear the File Explorer cache:
1. Press the Windows key + R to open the Run dialogue box.
2. Type ‘cleanmgr’ and press Enter. This will open the Disk Cleanup tool.
3. In the Disk Cleanup tool, select ‘Clean up system files’.
4. Check the box next to ‘Windows 11 Temporary Files’. This will also delete any thumbnail images and icons that are cached by File Explorer.
5. Click OK to confirm and start cleaning up your system files.
Clean Boot Your Windows 11

If you’re experiencing crashes in Windows 11 Explorer, one potential fix is to clean boot your Windows 11 installation. This will start Windows 11 with a minimal set of drivers and startup programs, which can help to resolve crashes that are caused by third-party software.
To clean boot your Windows 11 installation:
1. Open the Start menu and type “msconfig” into the search box.
2. Press Enter to open the System Configuration Utility.
3. Click on the “Boot” tab.
4. Check the “Safe Boot” option and click OK.
5. Restart your computer and wait for Windows 11 to start in Safe Mode.
6. Once Windows 11 has started in Safe Mode, open the Start menu and type “msconfig” into the search box again.
7. Press Enter to open the System Configuration Utility again.
8. Click on the “Boot” .
Modify Registry Editor.

When Registry Editor opens, navigate to the following key:
HKEY_CLASSES_ROOT\*\shellex\ContextMenuHandlers
On the right-hand side, delete the keys that are named after the menu items that you want to remove from the context menu. For example, if you want to remove the “Copy To” option, delete the {C2FBB630-2971-11D1-A18C-00C04FD75D13} key.
How do I fix a File Explorer that crashes when I right click?
If you find that your File Explorer crashes whenever you right-click on a file or folder, there are a few potential fixes you can try.
First, try restarting your computer. This November seem like an obvious solution, but sometimes a simple restart can fix minor glitches like this.
If that doesn’t work, try resetting the Windows 11 Explorer settings. To do this, go to Start > Control Panel > Folder Options. Under the “View” tab, scroll down to the “Reset Folders” button and click it. This will reset all of your folder views to their defaults, which November fix the issue.
If neither of those solutions works, there November be an issue with a specific context menu item. To troubleshoot this, open the Registry Editor (go to Start > Run and type in “regedit”) and navigate to HKEY_CLASSES_ROOT\Directory\Background\shellex\ContextMenuHandlers.
For each key in this folder, double-click on the “(Default)” value and change it from “1” to “0”. Close the Registry Editor and restart File Explorer – this should disable all context menu items except for the default ones provided by Windows 11. If the problem persists after doing this, you can narrow down which context menu item is causing the issue by re-enabling them one at a time until you find the culprit.
1. Restart Windows 11 Explorer
If your Windows 11 Explorer context menu is crashing, there are a few things you can try to fix the issue.
First, try restarting Windows 11 Explorer. To do this, press Ctrl+Shift+Esc to open the Task Manager. Then, click on the Processes tab and find Windows 11 Explorer in the list. Right-click on it and select End Task. Once Windows 11 Explorer has been ended, click on the File menu and select New Task (Run…). In the dialog box that appears, type explorer.exe and click OK. This will restart Windows 11 Explorer and hopefully fix the context menu issue.

If restarting Windows 11 Explorer doesn’t work, you can try resetting the Registry values that control the context menu. To do this, press the Win+R key combination to open the Run dialog box. Then, type regedit and hit Enter to open the Registry Editor. Navigate to HKEY_CLASSES_ROOT\Directory\Background\shellex\ContextMenuHandlers in the left pane of the Registry Editor window. In the right pane, delete any keys that correspond to items on your context menu that are causing crashes (you November need to research these online). Once you’ve deleted the problematic keys, close Registry Editor and restart your computer for the changes to take effect.
If neither of these solutions works for you, it’s possible that a third-party application is causing your context menu crashes. To troubleshoot this, first try starting Windows 11 in Safe Mode with Networking. To do this, restart your computer and hold the Shift key while it’s booting up. Once you’ve logged into Windows 11, press Ctrl+Shift+Esc to open the Task Manager. Then, click on the Startup tab and disable all the applications that are currently enabled. Restart your computer again and see if the context menu issue persists in Safe Mode with Networking. If it doesn’t, enable one application at a time until you find the one that’s causing troubles.
Note: If you’re having trouble accessing Safe Mode with Networking, try a System Restore instead (you can read more about how to do this here). This will roll back your system configuration to an earlier date when everything was working properly.
2. Run the Search and Indexing troubleshooter

If you’re experiencing crashes with the Windows 11 Explorer context menu, there’s a good chance that it’s due to a problem with the search and indexing feature. Fortunately, there’s a built-in troubleshooter that can help fix the issue.
To run the Search and Indexing troubleshooter:
1. Go to Start > Control Panel > Troubleshooting.
2. Under “View All”, select “Search and Indexing”.
3. Follow the prompts to run the troubleshooter.
Hopefully, this will resolve your context menu issues. If not, there are a few other things you can try, like resetting the Windows 11 Shell or performing a clean boot.
3. Perform an SFC scan

Performing an SFC scan is a great way to fix Windows 11 context menu crashes explorer. This process will scan all of the files on your computer and replace any that are corrupt or missing. To do this, follow these steps:
1. Click the Start button and type “cmd” into the search box.
2. Right-click on cmd and choose “Run as administrator”.
3. Type “sfc /scannow” into the command prompt and hit Enter.
4. The scan November take a while to complete, but once it does, restart your computer and see if the issue has been fixed.
4. Update Windows 11

If you’re experiencing crashes with the Windows 11 Explorer context menu, there are a few potential fixes you can try.
First, try updating Windows 11 to the latest version. Sometimes bugs can be fixed simply by installing the latest updates.
If that doesn’t work, try disabling any context menu items that you don’t use regularly. To do this, open the Registry Editor (press Start and type “regedit” into the search bar) and navigate to the following key:
HKEY_CLASSES_ROOT\Directory\Background\shellex\ContextMenuHandlers
For each item in this key, right-click it and select “Delete”. Once you’ve deleted all of the unnecessary items, restart Windows 11 Explorer and see if the problem has been resolved.
If neither of these solutions works, there November be a problem with your system files. Try running a System File Checker scan to repair any corrupt files. To do this, press Start and type “cmd” into the search bar. Right-click on Command Prompt and select “Run as administrator”. At the command prompt, type “sfc /scannow” and press Enter. The scan November take a while to complete, but once it’s finished, restart Windows 11 Explorer and see if the context menu crashing issue has been resolved.
5. Perform a clean boot

A clean boot is performed to start Windows 11 by using a minimal set of drivers and startup programs. This helps eliminate software conflicts that occur when you install a program or an update or when you run a program in Windows 11. You November need to perform a clean boot if you are experiencing crashes or freezes while using Windows 11 Explorer.
To perform a clean boot, follow these steps:
1. Type msconfig in the Start search box, and then press Enter.
If you are prompted for an administrator password or confirmation, type the password or provide confirmation.
2. On the General tab, click Selective startup.
3. Under Selective startup, clear the Load startup items check box.4. Click the Services tab, click to select the Hide all Microsoft services check box, and then click Disable all.
5. Click OK, and then restart your computer
6. Use a third-party file manager

If you’re experiencing crashes in your Windows 11 Explorer context menu, one potential fix is to use a third-party file manager. This workaround isn’t ideal, but it can help to resolve the issue until Microsoft releases a patch.
To use a third-party file manager:
1. Download and install a file manager such as 7-Zip or WinRAR.
2. Right-click on the folder or file you want to compress, and select “Compress” from the context menu.
3. Select the desired compression format and options, then click “OK”. Your files will be compressed into a single archive file.
4. Right-click on the compressed archive and select “Extract Here” from the context menu. This will extract the contents of the archive into a new folder.
5. Double-click on the new folder to open it in your file manager, then proceed to work with your files as usual. When you’re finished, simply delete the folder when you’re done (or compress it back into an archive if you want to save it for later).
Conclusion
If you’re experiencing context menu crashes in Windows 11 Explorer, there’s a few things you can try to fix the issue. First, try updating your graphics drivers. If that doesn’t work, try disabling anyshell extensions you have installed. You can also try resetting the Windows 11 Registry to its default settings. If none of those solutions work, you November need to reinstall Windows 11 altogether.