ASUS Armoury Crate is software that lets you customize the RGB lighting on your ASUS Republic of Gamers (ROG) devices. It also allows you to map macro keys, create profiles, and much more. In this article, we’ll show you how to install ASUS Armoury Crate on Windows 11.
What is ASUS Armoury Crate?
Table of Contents
ASUS Armoury Crate is a utility that comes pre-installed on some ASUS laptops. It allows you to control the lighting, fan speed, and other aspects of your laptop. You can also use it to install and update ASUS drivers and software.
Installing ASUS Armoury Crate on Windows is a simple process. First, you need to download the latest version of the utility from the ASUS website. Next, you need to extract the contents of the ZIP file to a location on your computer. Finally, you need to run the setup file and follow the on-screen instructions.

The Different Parts of ASUS Armoury Crate
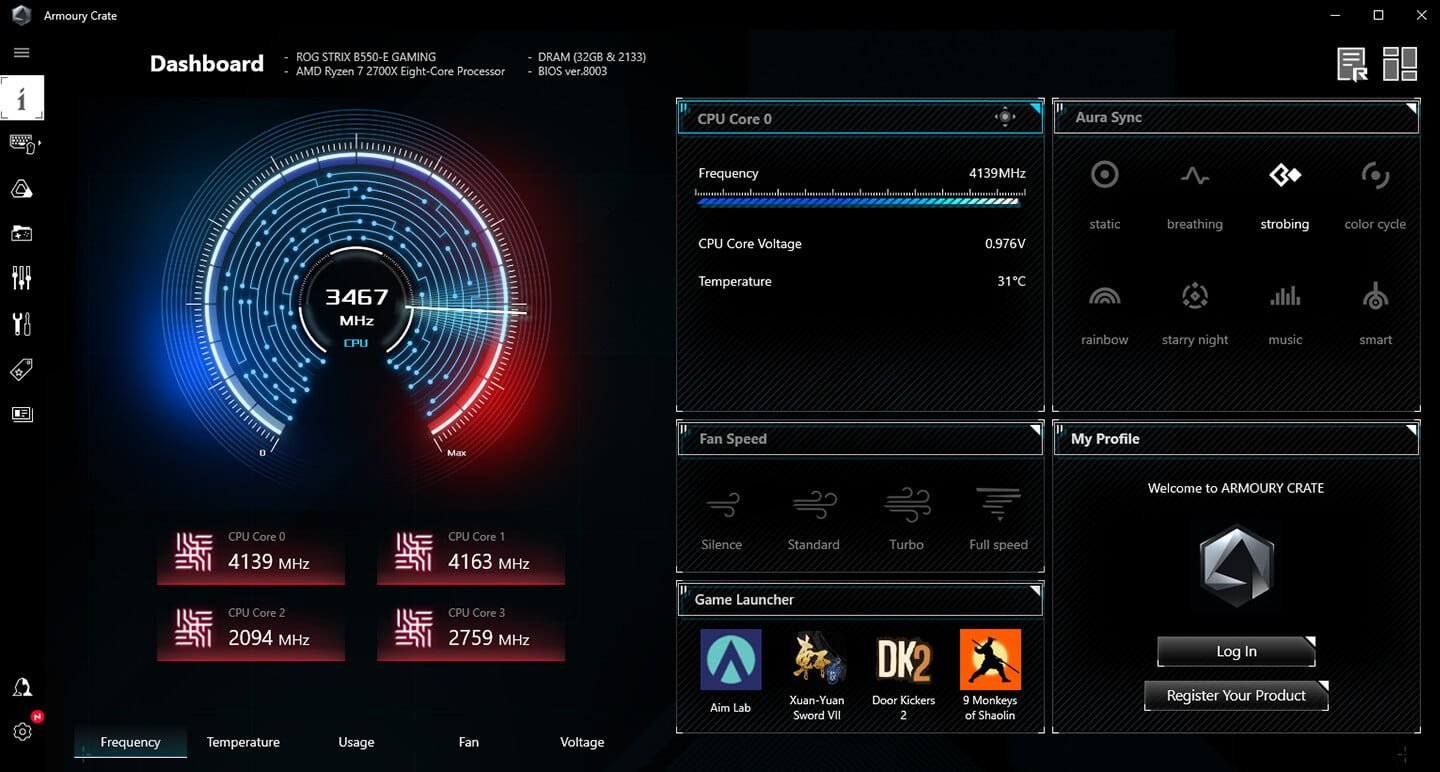
ASUS Armoury Crate is a software program that provides users with a variety of tools to customize their ASUS Republic of Gamers (ROG) devices. The program is divided into four main sections: the ROG Core, the GameFirst Networking Manager, the Sonic Studio sound manager, and the Aegis III overlay.
The ROG Core is the main interface for ASUS Armoury Crate. From here, users can access all of the program’s features and settings. The GameFirst Networking Manager allows users to optimize their internet connection for gaming. The Sonic Studio sound manager lets users control the audio settings on their ROG device. Lastly, the Aegis III overlay provides users with information about their system’s performance and status.
Installing ASUS Armoury Crate is simple and only takes a few minutes. First, users need to download the program from the ASUS website. Next, they need to install the program on their Windows PC. Finally, they need to connect their ROG device to their PC using a USB cable.
Fix to Install Armoury Crate on Windows 11
If you are having trouble installing ASUS Armoury Crate on your Windows 11 computer, there is a fix that July help.
First, make sure that you have the latest version of the Armoury Crate software. You can download it from the ASUS website.
Once you have downloaded the software, run the installer. When you are prompted to choose an installation location, choose the directory where you want to install the software.
Next, open the Armoury Crate software and click on the “Settings” tab. In the “General” section, click on the “Install Location” option and select the directory where you installed the software.
Finally, click on the “OK” button to save your changes and close the Settings window. You should now be able to use Armoury Crate on your Windows 11 computer!
ASUS Armoury Crate Installer Utility
1. Download the ASUS Armoury Crate Installer Utility from the ASUS website.
2. Run the installer and follow the on-screen instructions.
3. once the installation is complete, launch the Armoury Crate app.
4. Follow the on-screen instructions to create an account and log in.
5. Once you’re logged in, you’ll be able to access all of the features of ASUS Armoury Crate.
Download Armoury Crate (Beta) from Windows 11 Microsoft Store
1. Go to the Microsoft Store and search for “ASUS Armoury Crate”
2. Select the “ASUS Armoury Crate” app and click “Get”
3. Once the download is complete, launch the app
4. Follow the on-screen instructions to complete the installation process
Windows 11 Aapx Package Installer
1. Download the latest ASUS Armoury Crate Windows 11 Aapx package from the ASUS website.
2. Extract the contents of the zip file to a new folder on your hard drive.
3. Open the extracted folder and double-click on the “AsusSetup.exe” file to launch the installer.
4. Follow the on-screen instructions to complete the installation process.
5. Once the installation is complete, launch ASUS Armoury Crate from the Start menu or Desktop shortcut.
6. Follow the on-screen instructions to complete the initial setup process.
7. That’s it! You can now start using ASUS Armoury Crate to manage your gaming devices and settings.
Package deployment using Windows PowerShell
1. Package deployment using Windows PowerShell
2. Extract the downloaded .zip file
3. Run the .exe file and follow the on-screen instructions
Armoury Crate Services Installation on Windows 11
ASUS Armoury Crate services software provides a central location for you to manage all the customizable settings for your ROG devices. You can use it to change the RGB lighting effects, create and manage macros, adjust audio settings, and more.
Installing ASUS Armoury Crate is a simple process. Just follow the steps below and you’ll be up and running in no time.
1. Download the latest version of ASUS Armoury Crate from the ROG website.
2. Run the executable file and follow the on-screen instructions to install the software.
3. Once the installation is complete, launch ASUS Armoury Crate from your Start menu.
4. Sign in with your ROG account to unlock all the features of the software.
5. That’s it! You’re now ready to start customizing your ROG devices with ASUS Armoury Crate.
How to Install ASUS Armoury Crate on Windows 11
ASUS Armoury Crate is a software that comes with ASUS ROG laptops and desktops. It allows you to customize the RGB lighting, keyboard backlight, and other features of your device.
In this blog post, we will show you how to install ASUS Armoury Crate on your Windows 10 computer.
Before we begin, you will need to download the Armoury Crate software from the ASUS website.
Once you have downloaded the software, double-click on the setup file to begin the installation process.
Follow the on-screen instructions to complete the installation. Once it is finished, you will be able to launch the Armoury Crate software from the Start menu.
Now that you have successfully installed ASUS Armoury Crate, let us take a look at some of its features.
The main interface of Armoury Crate consists of five tabs: Profile, Lighting, Macro, Performance, and Settings.
The Profile tab allows you to create different profiles for your games and applications. This is useful if you want to have different settings for each game or application.
The Lighting tab allows you to customize the RGB lighting of your device. You can choose from a variety of preset modes or
Uninstall Armoury Crate Application from Windows 11
In this quick tutorial, we’re going to show you how to uninstall the Armoury Crate application from Windows 11.
Armoury Crate is a utility that comes pre-installed on ASUS ROG laptops. It’s used to manage different aspects of the laptop, including the keyboard backlight, system lighting, macros, and more.
If you don’t use Armoury Crate or you want to remove it for some reason, follow the steps below.
Step 1: Open the Start menu and search for “Add or remove programs”.
Step 2: In the list of installed programs, find “ASUS Armoury Crate” and click on it.
Step 3: Click on the “Uninstall” button and confirm that you want to remove the program.
That’s all there is to it! After following these steps, Armoury Crate will be completely removed from your Windows 11 computer.
How to Use ASUS Armoury Crate
1. Open the Armoury Crate software and click on the “Settings” tab.
2. In the Settings menu, click on the “System” tab.
3. Under the System tab, find the “ASUS Armoury Crate Service” section and click on the “Install” button.
4. Follow the prompts to install the Armoury Crate service on your Windows PC.
5. Once the installation is complete, click on the “Start” button to start using Armoury Crate.
FAQ
Q: What is the Armoury Crate?
A: The Armoury Crate is a utility that allows users to customize their ASUS ROG gaming laptops. It includes a number of features such as game profiles, fan control, and RGB lighting.
Q: How do I install the Armoury Crate on my Windows PC?
A: The first thing you need to do is download the Armoury Crate installer from the ASUS website. Once you have downloaded the installer, double-click on it to begin the installation process. When prompted, agree to the terms and conditions and click “Next”. The installer will then ask you where you want to install the Armoury Crate. Choose a location and click “Next”. The installation process will then begin. Once it is finished, click “Finish” to close the installer.
Q: How do I launch the Armoury Crate?
A: After you have installed the Armoury Crate, you can launch it by double-clicking on the shortcut that was created on your desktop. Alternatively, you can launch it from the Start menu.
Conclusion
We hope this guide has helped you install ASUS Armoury Crate on your Windows 11 machine. If you have any questions or comments, please feel free to leave them below. We’ll do our best to help you out.