How to Transfer Paytm Account to Paytm Bank Account
So Do you want to Convert your Paytm Account to Paytm Bank Account ? if yes then you are at right Place . Today we are here with the Guide on How to Transfer Paytm Account to Paytm Bank Account . Alright, so it’s out for quite a while now and it’s finally happening. Well, you might wonder what we are talking about here, Well, We are talking about the PayTM being the Bank. What does that mean? Well, you need not worry, we will tell you everything you need to know about. So let’s now start our take on How to Shift PayTM Account to PayTM Bank. But before getting Straight to Conversion Process, let’s discuss What Actually PayTM Bank is.
What is PayTM Bank
Paytm earlier in December 2016, thought of merging into a bank. So it started doing some Paperworks to merge its Virtual Wallets with a Bank once it receives the Regulatory Authority Approval. Earlier this week, the PayTM announced that it has successfully received the license from the Regulatory Authority, which is Reserve Bank of India for it’s Payments Bank Identity.
PayTM will be holding it’s bank Operations from 23 July 2017 under long-time executive and vice president Renu Satti, who will be the CEO of the Bank. It will be like any other bank and the operations of the PayTM Banks will also be similar to What the Typical Bank Offers. Although the interest rate is rumored to be somewhere around 14% p.a. It will be exciting to see How this Virtual Wallet Giant held it’s Bank Operations.
Related : How to Use Paytm Offline Without Internet in Any Mobile
With that being said, let’s now take a look What you need to do in Order to Shift PayTM Account to PayTM Bank. So, let’s get to it now.
How to Convert PayTM Account to PayTM Bank Account
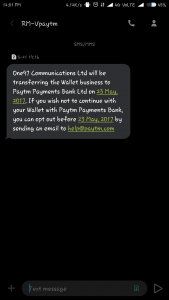
Well, if you are someone who has an account on PayTM, then the chances are you have already received this message from them.
So Now when you already know What it is about then, let’s now see the Steps you need to do in order to Shift PayTM Account to PayTM Bank. Well, do follow each of the Following Steps Carefully.
- First of All, you need to Open your PayTM app on your Smartphone.

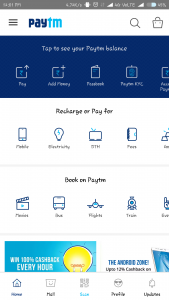

How to Convert PayTM Account to PayTM Bank Account - Now login to your Account by entering Phone Number and Password.
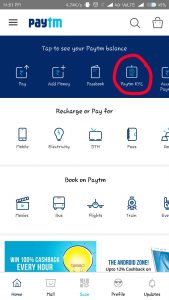
- You will be able to see PayTM KYC Option (4th from the Left).
- Tap on “Paytm KYC”.
How to Convert PayTM Account to PayTM Bank Account - Now just Complete your KYC Verification using AADHAR CARD.
- Enter your 12 digits AADHAAR No. and you Name as per AADHAR CARD to verify the KYC.
- You will now receive a Verification Number on your Phone Number linked with your AADHAR.
- Enter the Verification Code to Verify.
- Done!
What if I don’t have AADHAR CARD?
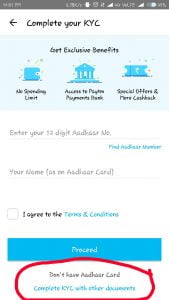
Well, if you don’t have an AADHAR CARD, then you can verify Yourself using Other Documents like Passport, Voter ID, Driving License or NREGA Job Card if you have one.
That’s just about it, once you have verified your Details with KYC, your Wallet will automatically be shifted from Wallet to Bank and limit which was 25000 before will be increased to 1 lakh now. If you have already verified your KYC Before, then you need not do anything.
In case you don’t wish to continue, simply write a mail to he**@pa***.com.
That’s it, We hope you found our Post, How to Shift PayTM Account to PayTM Bank useful. In case you have any questions, you can leave them in the Comments below.