Enable WhatsApp Payments on Android and iOS: WhatsApp is one of the leading and most adopted messaging applications in the world. This Facebook-owned messaging application has been testing its payment service in the country for almost a year now. Although not a lot of people did not get to test this feature, we at RootUpdate are lucky enough to get it. After using it for months now, we have a lot of talk about this feature, which now is finally made available to a large number of users.
If you are a WhatsApp user and are unable to Enable WhatsApp Payment on Android and iOS, this guide is tailor-made for you. In this guide, we not only will discuss How to Enable WhatsApp Payment on Android and iOS but also have a discussion on whether or not you should use it and everything you need to know about this feature.
What is WhatsApp Payments? And how does it Work?
Table of Contents

So, what is WhatsApp Payments? Is it any useful? What makes it so special? Why do I need to Enable WhatsApp Payments on Android and iOS? Well, I know these are the question you might are having in your head! Well, to begin with… WhatsApp Payments is essentially not a new feature. This feature was initially announced a year ago but it was only made available for a few users. But now this feature is rolling out officially for all its users given the National Payments Corporation of India which is often referred to as NPCI has given the approval for WhatsApp. As a matter of fact, this feature is grounded on the country’s Unified Payments Interface (UPI) framework to facilitate the money transfer.
Also Read: How to Root Xiaomi Mi 10T and Unlock Bootloader
Now, you might have understood a bit about this feature. But to make it much clearer for you, WhatsApp Payments is just like any other UPI application. Just like PhonePe, Google Pay, Paytm, or any other UPI-based interface for that matter, WhatsApp Payments is also a feature that enables you to connect with your bank and register through UPI and make the payments.
What makes WhatsApp Payments Special?
Okay, now you might have been wondering, why do you need to Enable WhatsApp Payments on Android and iOS when you already have Google Pay, PhonePe, and etc. Well, for starters, WhatsApp Payments is not a separate application like the aforementioned ones. It is integrated within the WhatsApp messenger. Now that means, you can save storage by using this application.
Not just that, just imagine requesting money from your friend or family, in the form of a payment link directly on WhatsApp. But for that, you and your friend must be using the WhatsApp Payments feature and Enable WhatsApp Payments on Android and iOS. Once everyone link their bank accounts with WhatsApp, money transferring can be as simple as it can get. You can directly request money in the form of a payment link with the amount you need and the description too. Now, the other person can simply choose to pay, and without even leaving the conversation, a payment can be made. How cool is that when you Enable WhatsApp Payments on Android and iOS?
WhatsApp Payments: Everything you need to Know!
- As mentioned earlier, WhatsApp Payments works on the Unified Payments Interface which is often referred to as UPI. This is the same framework that is used on your current apps like PhonePe, Google Pay, and etc.
- Do note that, WhatsApp Payments is not like Paytm. It does not use Wallet like Paytm or FreeCharge. The money is held in your bank account itself and WhatsApp payments which just ask as a platform that will help you transfer it once you Enable WhatsApp Payments on Android and iOS.
- Anyone with your WhatsApp UPI ID can send payments to your bank directly. Now this means, you can simply share your WhatsApp Payment’s UPI ID to anyone instead of your account number, IFSC, and etc to directly receive money to your account.
- WhatsApp Payments is not a bank. To register to WhatsApp Payments, you will need a bank account first. Also, your WhatsApp registered phone number and the number linked to your bank account should be the same.
- Just like how you can send images and other media files by clicking the attachment icon in the chatbox, you can send or receive money from anyone among your WhatsApp.
- Given that WhatsApp is grounded on UPI, it would be secured by a passcode which you will have to create during the setup. Although people can access your phone and WhatsApp, but they cannot touch your money without the UPI password.
- Only Indian mobile number, with country code +91, can only create WhatsApp Payments. If you use an NRI bank account and use the same number to your NRI account and WhatsApp, you can obviously use this feature.
- As for the transaction limits, it can only be 1,00,000 INR (1 Lakh) which is a UPI’s restriction.
- Transferring and receiving money does not cost you anything, now that means, WhatsApp Payments is a free to use feature.
- Do note that, currently, you can only transfer money from WhatsApp Payments to registered WhatsApp users. So, if you are expecting to transfer money from WhatsApp Payments using the account details like IFSC and account number, that feature is not made available yet. And we certainly are not sure whether this feature is on the line.
How to Enable WhatsApp Payments on Android and iOS
Now, with everything out of the way, let us address the elephant in the room here. You can enable WhatsApp Payments on Android and iOS devices. Let us now discuss How to Enable WhatsApp Payments on Android and iOS separately. First, let us begin with How to Enable WhatsApp Payments on Android
Also Read: MIUI 13: Release Date, New Features, Supported Devices, and Everything you Need to Know!
How to Enable WhatsApp Payments on Android
- Open the WhatsApp application from the app drawer or home screen.
- Once opened, on the top right corner, you will get to see a three-dot menu. Click on the three-dot menu.
- In the menu, you will get to see an option named Payments. Click to choose Payments.
- Now, select add new payment method.
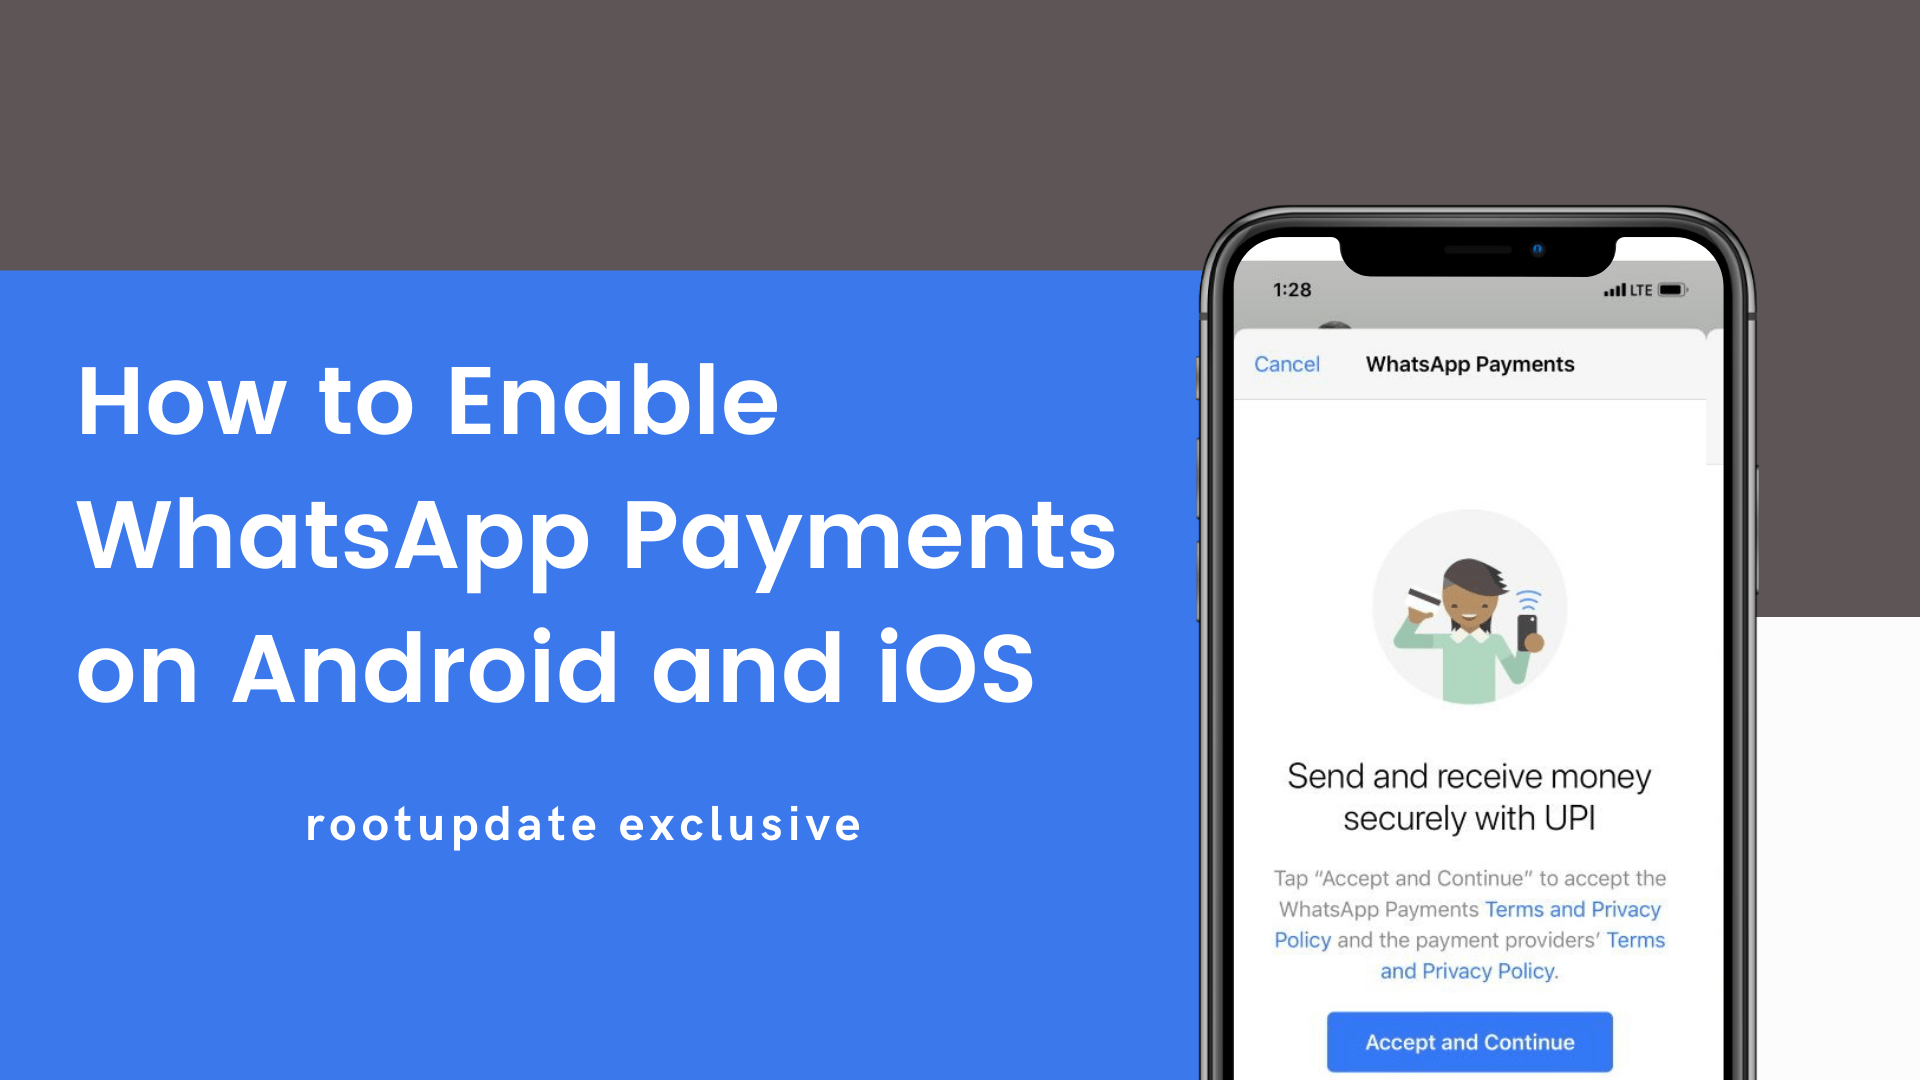
- Select Accept and Continue to get started.
- From here, you will now have to select your bank from the list and this should ideally be your primary UPI account.
- Now, you will need to verify your phone number. Make sure that your registered WhatsApp number and the bank account number is the same.
- Click on Verify via SMS, to authenticate your bank account.
- Now, your account will get verified with your bank and you will now be done with the process of setting up WhatsApp Payments on your Android.
- This is How to Enable WhatsApp Payments on Android devices.
How to Enable WhatsApp Payments on iOS
- Open WhatsApp Messenger on your iPhone.
- Once opened, on the bottom right corner, you will get to see the settings.
- Click on the settings and scroll down and you can now see an option for Payments.
- Once you open, at the bottom you can see Add new payment
- Select Accept and Continue to get started.
- From here, you will now have to select your bank from the list and this should ideally be your primary UPI account.
- Now, you will need to verify your phone number. Make sure that your registered WhatsApp number and the bank account number is the same.
- Click on Verify via SMS, now this opens your Messaging app with a message which you should choose to send message.
- Once done, your account will get verified with your bank and you will now be done with the process of setting up WhatsApp Payments on your Android.
- This is How to Enable WhatsApp Payments on iOS devices.
Also Read: Download Oxygen OS 11.0.3.4 Update for OnePlus 8T (Latest)
This is how you can Enable WhatsApp Payments on Android and iOS. If this guide helped you clear all your doubts around WhatsApp payments and helped you to Enable WhatsApp Payments on Android and iOS, do consider sharing this post with your friends and family. If you have any further doubts about the same, please feel free to drop in your query in the comment section below. With that said, we have come to the end of this post. For more posts like this, stay tuned by clicking the bell icon on the bottom-right of your screen.