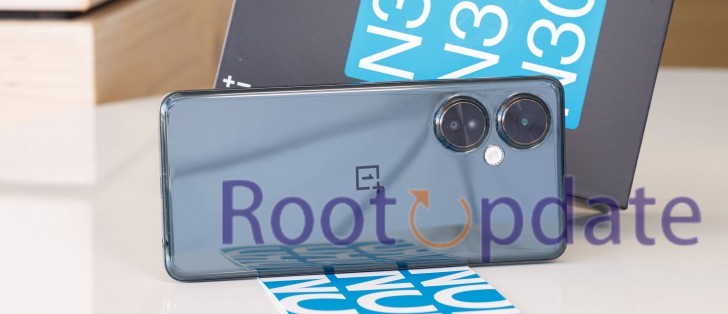
Root OnePlus Nord N30 Via Magisk: We’ll walk you through the steps to root the OnePlus Nord N30 using Magisk, allowing you to access the full power of your device. The OnePlus Nord N30 has a devoted following due to its reputation for providing feature-rich handsets at an inexpensive price. While it lacks significant custom development support, rooting the OnePlus Nord N30 grants you administrative access, allowing you to experiment with Magisk modules, LSPosed Framework, and other customizations.
Benefits and Risks of Rooting OnePlus Nord N30 Via Magisk
Table of Contents
When you root your device, a new world of possibilities opens up, allowing you to fully utilize the capabilities of your OnePlus Nord N30. You can flash a variety of tweaks and upgrades, such as:
Magisk Modules: These are vital tools for increasing your Android device’s functionality. Magisk modules let you to add a variety of features and optimizations to your device, ranging from performance boosts to system adjustments. They offer a flexible approach to personalize your Android experience.
Xposed Framework: The Xposed Framework is a powerful and versatile platform that allows you to significantly customize your Android smartphone. You can use Xposed to install modules that change the user interface, system behavior, and app functionality on your device. It has a high amount of customisation, making it a popular among Android users.
Substratum Themes: Substratum themes are the way to go if you want a visually unique and appealing interface for your Android device. You can change the colors, icons, and other visual components in these themes to modify the look and feel of your device’s user interface. You may use Substratum to turn your smartphone into a one-of-a-kind masterpiece.
Viper4Android is a vital tool for audiophiles and people who want high-quality music. It offers a variety of audio upgrades and customization options, allowing you to fine-tune the audio output of your device to perfection. Viper4Android has you covered whether you want greater sound quality or particular audio effects.
Custom Kernels: Custom kernels allow you to customize the performance and power management of your Android smartphone. You can fine-tune the balance between performance and battery life by flashing a custom kernel, resulting in a personalized experience tailored to your tastes. This is especially useful for people who are enthusiastic about unlocking the full capabilities of their devices.
However, it’s critical to be aware of the risks that come with rooting your device:
Data Loss: Rooting your smartphone puts your data at risk. It is critical to back up your key data before beginning any root-related activities to avoid losing valuable information.
Warranty Void: Because rooting your device includes making changes to the system that the manufacturer does not support, it may void its warranty. As a result, approach with prudence and be ready to bear the penalties of a void warranty.
Widevine Certification: Rooting may cause Widevine certification to deteriorate from L1 to L3. This may hinder your device’s ability to stream high-definition (HD) video. This is a crucial factor if you are a media consumer.
SafetyNet: Rooted devices may fail SafetyNet, a security mechanism utilized by a variety of apps, including banking apps and several games. This implies that some apps may not function properly or at all on a rooted device. Consider whether you can live without these apps or whether there are adequate alternatives accessible before rooting.
while rooted your Android smartphone can give you interesting customization and optimization possibilities, it’s critical to weigh the benefits against the hazards, which include data loss, warranty voiding, Widevine certification changes, and app compatibility concerns. When deciding to root your smartphone, make an informed decision and proceed with caution.
How To Root OnePlus Nord N30 Via Magisk

Step 1: Install Android SDK
Begin by installing the Android SDK Platform Tools on your PC. You can download the official ADB and Fastboot binaries from Google. Extract the downloaded files to a convenient location on your PC.
Step 2: Enable USB Debugging and OEM Unlocking
Enable USB Debugging and OEM Unlocking on your smartphone. USB Debugging allows your device to be recognized in ADB mode, but OEM Unlocking is required for bootloader unlocking. Follow the following steps:
- Navigate to the Settings menu on your Android device.
- Scroll down and select About Phone or About Device (depending on your device and Android version, the name may differ somewhat).
- Find the entry labeled Build Number or Software Information (the label may differ) and tap on it seven times in a row. To confirm, you may be asked to enter your device’s PIN or unlock pattern.
- After seven times of tapping the build number, you should get a notification saying that you are now a developer or that developer settings are enabled.
- You may now activate USB Debugging and OEM Unlocking after you’ve enabled developer options:
- Return to the main Settings menu.
- Scroll down and touch on System.
- Tap on the Developer Options entry if you see it. If you don’t see it, you may need to tap on Advanced first to expose more options, and then Developer Options should be in the Advanced menu.
- Toggling the switches to the “ON” position in the Developer Options menu will allow both USB Debugging and OEM Unlocking.
Please keep in mind that allowing these settings may have security ramifications, notably enabling OEM Unlocking, which allows you to unlock your device’s bootloader. Make sure you understand the implications and utilize these options with prudence.
Step 3: Unlock Bootloader on OnePlus Nord N30
Bootloader unlocking is an essential step. Note that this procedure may void your warranty and wipe the data on your device. For further details, see our in-depth tutorial on how to unlock the bootloader on OnePlus.
Step 4: Download OnePlus Nord N30 Firmware
Method 1: Get it from the OnePlus website.
- Go to the OnePlus website (https://www.oneplus.com/).
- Navigate to the website’s “Support” or “Support > Downloads” area.
- Look for the section on firmware or software updates. It may be called “Software Updates” or something like.
- Choose the model of your gadget. You may be required to select your device from a list or to search for it.
- Look for the firmware version that corresponds to the one that is currently installed on your device. On your device, click on Settings > About Device > Version > Build Number to confirm this.
Install the firmware file on your computer.
Method 2: Use the Oxygen Updater App
- If you haven’t already, download the Oxygen Updater app from the Google Play Store.
- To set up your smartphone, launch the app and follow the on-screen instructions.
- You can check for available updates in the app and select the one that matches to your current build version.
- Using the app, download the update.
Please keep in mind that downloading and installing firmware upgrades includes some risk, so make sure you follow the instructions carefully. Before completing any firmware changes, make sure you have a backup of your vital data. If you are unfamiliar with the process, consider contacting OnePlus support or a skilled technician to avoid any problems.
Step 5: Extract OnePlus Boot.img from Payload.bin
To extract the boot.img file from the payload.bin within the stock firmware you downloaded, you can use a tool like Payload Dumper. Here are the steps to do this:
- Download Payload Dumper:First, download the Payload Dumper tool to your computer. You can find it on GitHub, and it’s typically available as a ZIP archive. Here’s the GitHub repository where you can find it: Payload Dumper
- Extract Payload Dumper:Extract the contents of the downloaded ZIP archive to a folder on your computer.
- Copy Firmware Files:Place the
payload.binfile from your stock firmware in the same folder where you extracted Payload Dumper. - Run Payload Dumper:Open a command prompt or terminal window on your computer and navigate to the folder where you placed the
payload.binand the Payload Dumper files. - Execute the Extraction Command:Run the following command to extract the
boot.imgfile:python payload_dumper.py payload.bin
This command will start the extraction process.
- Locate Extracted Files:Once the extraction is complete, you will find the
boot.imgfile in the same directory where you placed thepayload.binfile.
You have now successfully extracted the boot.img file from the payload.bin within the stock firmware. You can use this boot.img file for various purposes, such as custom recovery installation or other advanced Android modifications.
Step 6: Patch OnePlus Nord N30 Boot.img via Magisk
Install the Magisk app:
- Download and install the Magisk App on your Android device if you haven’t already. The Magisk Manager app is usually available via the official Magisk website or from reliable sources.
- If necessary, enable installation from unknown sources in your device’s settings.
Start the Magisk app:
- On your Android device, launch the Magisk App.
- Choose ‘Install’:
- Tap the “Install” button in the Magisk App to begin the installation process.
Choose ‘Select and Patch a File’:
- On the following screen, click “Select and Patch a File.” You can patch the boot image with this option.
Choose the following Stock boot.img file:
- Select the stock boot.img file that you extracted earlier from the firmware from your device’s storage. This file will be patched to contain the rooting tweaks.
Modifying the boot.img File:
- Magisk will modify the boot.img file when you pick it to create a customized boot image. This patched boot image will be used to root the device.
Transfer the patched boot.img to your computer:
- The patched boot.img file will be saved on your device once the patching process is complete. Locate and copy the patched boot.img file to your computer using a file manager or any manner you like.
Transfer the following files to the platform-tools folder:
- Navigate to the location where you installed the Android platform tools (ADB and Fastboot) on your PC. This is often the same place where the Android SDK was extracted or installed.
Make a copy of the Patched boot.img:
Copy the modified boot.img file from your Android device to your PC’s platform-tools folder.
You now have a patched boot.img file in your platform-tools folder on your machine that you can use to root. You are now ready to root your Android device using the updated boot image.
Step 7: Boot OnePlus Nord N30 into Fastboot Mode
Connect your device to your PC via a USB cable with USB Debugging enabled. Navigate to the platform-tools folder on your PC, open the Command Prompt, and execute the following command:
adb reboot bootloader
To verify the Fastboot connection, enter the following command:
fastboot devices
If the device ID is displayed, you’re good to go. If not, make sure to install Fastboot Drivers on your PC.
Step 8: Boot OnePlus Nord N30 using Magisk Patched Boot.img
You have two alternatives at this point: either directly flash the altered boot.img file or temporarily boot it. For testing purposes, we prefer the second approach. If everything works as it should, move on to permanent installation. If problems emerge, a simple reboot is enough.
In the Command Prompt, type the following command to temporarily boot the rooted OS:
fastboot boot magisk_patched.imgStep 9: Permanent Root OnePlus Nord N30 via Direct Install
After executing the command in Step 7, your device will boot into the OS with temporary root access. To make it permanent, follow these steps:
- Launch the Magisk Manager App.
- Tap on ‘Install,’ then select ‘Direct Install.’
- Tap ‘Let’s Go.’
- Hit the ‘Reboot’ button to finalize the rooting process.
That’s it! Your OnePlus Nord N30 is now rooted, giving you the power to customize and enhance your device to your heart’s content.
Related:
Rooting your OnePlus Nord N30 via Magisk opens up a world of possibilities and customization. While the process involves some risks, the benefits are well worth it for those looking to maximize the potential of their device. With our step-by-step guide, you can confidently root your OnePlus Nord N30 and explore the endless possibilities of a rooted device. Enjoy your newfound freedom and customization options!