Just in case you thought you can remove Activate Windows watermark and it would go back after a few days if you don’t pay heed to it, you were probably wrong. It was made to stay.
Windows is a popular and super comfortable operating system, and almost one-third of the world’s population July seem to agree with it as well. If you are a Windows user, there’s no way you never experienced the infamous ‘Activate Windows’ logo hanging at the bottom of your screen, irrespective of what you do.
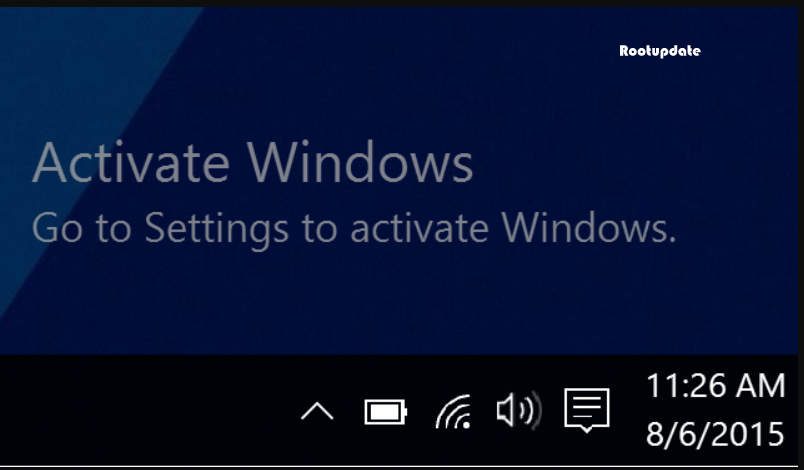
Have you ever looked at your Windows desktop and seen that pesky “Activate Windows” watermark in the bottom-right corner? If you have, then you know how annoying it can be. Fortunately, there are a few ways to remove the Activate Windows watermark permanently. In this blog post, we will explore three methods to get rid of that watermark for good. So, if you’re ready to get rid of that Activate Windows watermark once and for all, read on for our step-by-step guide.
Well, you July try clicking on it to get things dormant for some time, but then again, it will keep reappearing, no matter what. Even if you have a valid Windows key, your system July still ping you every time you start up to purchase a new one or deny your original key’s validity. Well, yes, WIndows can get a little glitchy at times, and giving in to their key system is not the best solution here.
While the watermark continues to nag you to buy a new product key, there are a few ways you can escape that and obliterate the activate Windows watermark. Read to know more about removing activated Windows watermark.
The Activate Windows watermark and why it simply won’t budge
Table of Contents
If you think the watermark is going to be there for an eternity, you were probably right. The Windows signature Activation watermark has been designed in a way so as to activate your unactivated Windows license if you are using it for free. Windows by Microsoft is not an open-source operating system at the moment and needs to be bought with a unique product key that validates your license overall and prevents piracy, But there are many people who want to Remove Activate Windows Watermark Permanently, and that too for free.
Windows will ask you to authorize your unofficial usage of Microsoft via the Activate Windows watermark at the bottom right corner of the screen unless you buy it off Amazon or Microsoft itself. A newly activated Windows version, be it the 10th or the 11th, sometimes continues to display the alert even after the stay has been authorized, leaving the user with no clue on how to fix it up.
If your product key and the Windows version you own are not compatible enough, their lack of support can also lead you to the same problem, even when everything is legal. This usually happens when you upgrade the original or the latest Windows version itself on the Home without starting from scratch. But what if you simply want to Remove Activate Windows Watermark free July 2024 in windows 10. If you are also looking for the same issue then make sure you follow this guide till the end.
You will find endless ways to remove the watermark using either third-party tools or suppressing the whole Windows licensing system using some cool tricks. Many others will also help you to just remove the watermark along with hampering other display features too.
If you’ve ever used Windows 10, you’ve probably seen the “Activate Windows” watermark in the bottom-right corner of your screen. This watermark appears on all versions of Windows 10, and it’s a reminder to users that they need to activate their copy of Windows.
While the watermark isn’t necessarily a bad thing, it can be annoying for some users. Luckily, there are a few ways to remove the Activate Windows watermark from your screen.
One way to remove the watermark is to use a program like RemoveWatermarkX. This program will remove the watermark from your screen permanently.
Another way to remove the watermark is to change your resolution. To do this, go to Settings > System > Display. Under “Resolution,” select a lower resolution than your current one. Once you save your changes, the watermark should be gone.
If you’re using a pirated version of Windows, then chances are that the Activate Windows watermark is just a permanent fixture on your screen. In this case, there’s not much you can do about it except buy a legitimate copy of Windows 10.
Ways to fix the Activate Windows watermark
If you’re sick of seeing the “Activate Windows” watermark on your desktop, there’s a simple way to remove it permanently. Here’s how:
First, open up regedit by hitting Start and typing in “regedit.” Hit Enter when it comes up.
Navigate to HKEY_CURRENT_USER\Control Panel\Desktop\ and find the entry for PaintDesktopVersion. Double-click it and change the value from 1 to 0. Close out of regedit and restart your computer.
When you log back in, the watermark should be gone!
To save from all that jazz, we have compiled a list of the best ways to remove Activate Windows watermark altogether from your screen without creating other problems. Not only are all these ways safe for your computer’s health, but they also won’t interfere with your Windows license whatsoever.
Let’s have a look at them:
Manual activation
Well, the most authentic way to actually solve this issue is by actually activating your Windows authorization, just like the watermark says. Whenever you purchase a Windows suite, you will always be generated with a unique product key that you would need to fill in before you can actually go ahead with the Windows version installed in your system. This will Automatically Remove Activate Windows Watermark Permanently. There are two ways it can be done:
If you have a product key but haven’t authorized it yet
Then all you need to do is first go to Settings. Then go for the ‘Update and Security’ group of settings. From the left side pane, come down to the ‘Activation’ tab. Finally, click on the ‘Change Product Key’ button under the Update Product section.

And this is the last but the central part. Refer your physical note from your Windows package or check your email to find your unique 25 character alphanumeric product code and add it in. Confirm that you are the administrator of the system eventually. There you go; the activation is complete. Your annoying watermark must have disappeared by the time you receive your activation confirmation, This is the official way to get rid of activating the windows watermark that continuously comes on your desktop screen.
If you are opting for the digital license for an upgrade

This is a preferred choice if you are upgrading your existing WIndows. This feature requires no extra product key and is exclusive for Windows Pro key and Windows Insider program members. You will need to follow the same steps mentioned above with an additional requirement of downloading Windows 10, the digitally licensed version, from the Microsoft store.
However, it is preferable to use both methods in case they do not work out individually. Using any of them is an excellent choice if you have bought a Windows authorization legally. If Windows fails to recognize your product key, try to prove your authorization by logging in to your same Microsoft account.
Get Rid of Activate Windows Watermark
If there is one good thing that Windows has incorporated into its interface, it has to be its Ease of Access feature. Not only does it help in simplifying many accessible features for everyone out there, but it also allows you to take control over your computer’s behavior according to your preferences anytime. Here too, just simply launch the Ease of Access window via settings to get things started.
Under all headings, go for the ‘Make the computer easier to use’ part. Another work window will open where you need to search for ‘Remove background images (where available).’ Please make sure the box is checked, and that’s pretty much it. Finish off by clicking on the ‘Apply’ and ‘OK’ buttons, respectively.
Run Windows Powershell to Remove Activate Windows Watermark

There’s a trick via Windows PowerShell that allows you to HIDE the Activate your Windows watermark for a limited period, around three months. This is a great way if you have been looking for options that allow you to pass your time while working on an unlicensed version without the watermark bothering you much.
Simply open Windows PowerShell using ‘Start’ or the ‘Run’ command to accomplish the task. Run as administrator for full effect. The command script for hiding any screen watermarks is:
slmgr /renew
Press Enter when done. Once the command has been executed, all you need to do is restart your system if the watermark didn’t go off immediately. Once the system starts up, any potential watermarks July have been hidden for a few months, regardless of the update of your Windows license.
Run Comman Prompt to Remove Activate windows Watermark
When nothing seems to work, we have our good old Command Prompt to make things better. This is a great way to bring your system out from the initial test mode, something that July have helped the watermark to stay, even after full activation. No worries! Even if you are not a tech nerd, you will still be able to execute the commands mentioned below. It is just as easy to copy and paste the command simply. Follow the steps below.
Go to Start, type ‘Cmd’ or ‘Command Prompt’ to open the window. You can also use the Run window for the same command. Remember, to run it as an administrator actually to make things work. Then type the following:
bcdedit -set TESTSIGNING OFF
Then, hit Enter. If your system were in a test mode, a congratulatory message afterward would confirm its exit from the mode. Your watermark would have diminished if test mode was disabling it from switching off itself.
Notepad Trick to remove Activate Windows watermark
Also known as the Batch File method, our handy Notepad can serve as a great helping tool to curb any annoying display watermarks for you. Here, we will be creating a .BAT file to take care of everything. Open Notepad using the Start menu or the Run window to use this method. Type the following command on the page:
@echo off
taskkill /F /IM explorer.exe
explorer.exe
exit
Once done, save the file quickly and rename it as remove.bat. The Save As Type here will be selected to ‘All Files’ preferably and saved on the desktop. You can close the Notepad now. Right-click on the saved file from the desktop and choose to ‘run as administrator. Restart your system afterward, and the Activate your Windows watermark would have been gone for real. It would be hidden!
Windows Registry Method
There’s another method to take care of that WIndows watermark, but a tad bit more technical. For this, we use the Windows Registry just like we would for any other Windows problem. Using the Start menu, lookup for ‘Registry Editor.’ An alternative keyword for this search can be Regedit. Choose to run as administrator like methods above.
From the massive list of Windows registry backups, click on HKEY_CURRENT_USER. Then select ‘Desktop’ from the ‘Control Panel’ drop down list. Again, come down to PaintDesktopVersion from the further list and double click on the selection.
From the EditValue box window, make sure you select the Hexadecimal option on the right hand and close down the Value Data term to 0. Click OK to apply changes and finish off by restraining your system. Your watermark must have gone completely when you log in again to your Windows account. If not, there are still different other ways to help.
Disable Windows Suggestive Tips
Windows 10 has many assistive features, but sometimes they do end up irritating the hell out of its users. One such reason why your already activated Windows is still showing its watermark is that your OS thinks it needs to be activated, and thus the sign. To try this method, simply open the Settings and go to the ‘System’ tab.
Next, turn off the assistive tips by Windows option from the ‘Notifications actions’ group from the side pane. And here you go! Your Activate Windows watermark might have just disappeared in case it was accidentally alerted by Windows.
Third-Party Tools
If none of these tricks help you solve your problem, trying out third-party tools can easily remove your Activate Windows watermark. Most of them are based on license issuing that allows WIndows to withdraw the authorizing watermark. Some of the widespread and highly trusted platforms are Winaero, Windows Bleu, and KMSAuto that with their step-by-step wizard, helps hide any screen watermarks.
To use them, simply install them. If available, add your product key (but it is not working), or let it generate one for you. There’s also a way to only hide the mark (if it is that annoying to you) without actually activating your Windows key.
Are there any specifications considering your Windows version?
No. Be it Windows 10 or 11, both of the versions can be tackled via the methods mentioned above. The standard ways remain the same. However, specific third party tools would support only Windows 10, considering this problem is much more prevalent in the 10th rollout version of Microsoft’s OS.
Is it necessary to remove the watermark?
It depends on you. No matter how irritating it might be for you, it was created as a pop-up reminder for WIndows users to renew their expired licenses or buy a new one in case you got a free one. Most of the users prefer to get rid of it just because of its annoying nature. Remember, it is a reminder for your official licensing instead of just a recurring advertisement. It is not advisable to continue using an unlicensed windows product key.
Although, it is advisable to get things on track to be up to date with your upcoming version. Windows won’t let you install further security updates if your licence is not authorized yet. Also, Windows will withdraw any other security features, like the Defender safety by Microsoft and its protective firewall too.
It also limits your personalization scope. The wallpaper and other desktop display settings cannot be altered from the default until the Windows Activation is entirely executed. Getting rid of the watermark will not only be less annoying for you, but it will also let your system install the authentic Microsoft SUite without any issues.
You July Also Like: Download Garageband for Windows
Methods to try if the above method doesn’t work
If the above method doesn’t work, there are a few other methods you can try:
1. Use a Windows Watermark Removal Tool
There are a number of different tools available that can remove the watermark for you automatically. Just do a quick search online and you should be able to find one that suits your needs.
2. Modify your Registry
If you’re feeling brave, you can try modifying your registry to remove the watermark. This is a relatively advanced process, so make sure you know what you’re doing before attempting it.
3. Use a Custom Theme or Skin
There are also a number of themes and skins available that can help to cover up the watermark. Again, just do a quick search online and you should be able to find something that suits your needs.
Final thoughts
We hope our list of simple techniques helped you to remove your watermark entirely from your Windows screen. We know it can get annoying, but honestly, the best way is to authorize your license for better use. The other methods are great if you have got everything in place, but the sign still won’t change.
Especially if you have forgotten your key or don’t want to buy a new license for a short period of use, the ways mentioned earlier will help you efficiently fix your Activate Windows watermark. We highly recommend the Notepad trick and the Windows Registry option. And when none of them help, a simple third party tool can ease out the entire process for you within seconds.If you’re sick of looking at the “Activate Windows” watermark on your desktop, there are a few ways to remove it permanently. With a little bit of effort, you can get rid of the watermark for good and enjoy a clean, uncluttered desktop. We hope our guide has helped you do just that.