Use Custom Fingerprint/Build.Prop To Pass Play Integrity Test: In the world of rooted devices and custom ROMs, which is always changing, getting management rights usually costs something. Rooting your device can make the SafetyNet Test fail, which means you won’t be able to use important apps like banking and payment apps. Since Google added the Play Integrity Test, which all apps must pass by January 2025, things have gotten worse. This guide shows you two good ways to make custom fingerprints/build.prop that will help you pass the Play Integrity Test on your rooted device or custom ROM.
The Play Integrity Challenge
Table of Contents
Rooted devices face a significant challenge with Google’s Play Integrity Test. If your device is rooted, passing this test becomes imperative to access essential applications. Google continually patches existing methods, making it a cat-and-mouse game for tech enthusiasts.
How to Successfully Pass Play Integrity Test with Custom Fingerprints/Build.prop

One Click Method [Easiest]
Thanks to Chiteroman, an XDA Senior Member, there is a plug-and-play option for everyone. The process is easier with module v14.2, which you can find on GitHub. Do these things:
- Enable Zygisk:
- Zygisk is a Magisk module that enhances systemless module support. To enable Zygisk, follow these steps:
- Open the Magisk Manager app.
- Navigate to the “Settings” menu.
- Find the “Zygisk” option and toggle it to enable.
- Zygisk is a Magisk module that enhances systemless module support. To enable Zygisk, follow these steps:
- Flash the Module via Magisk:
- Assuming you have the Magisk module you want to flash (e.g., a Zygisk module or another module that requires Magisk), follow these steps:
- Open the Magisk Manager app.
- Tap on the “Modules” section.
- Click on the “+” button to add a module.
- Navigate to the location where the module file is stored and select it.
- Once selected, Magisk will prompt you to install the module. Confirm and wait for the process to complete.
- Reboot your device.
- Assuming you have the Magisk module you want to flash (e.g., a Zygisk module or another module that requires Magisk), follow these steps:
- Delete Data from Google Services Framework, Play Store, Play Services, and Play Protect Service:
- To delete data from these services, follow these general steps (please note that the exact steps might vary based on your device):
- Go to “Settings” on your device.
- Navigate to “Apps” or “Application Manager.”
- Find and select “Google Services Framework,” “Play Store,” “Google Play Services,” and “Google Play Protect Service” one by one.
- Inside each app, go to “Storage” or “Storage Usage.”
- Select “Clear Data” or “Clear Storage.”
- Confirm the action.
- To delete data from these services, follow these general steps (please note that the exact steps might vary based on your device):
Automatic Method [Recommended]
For a more complete technique, the automatic method is both easy to use and effective. Follow these steps:
- Obtain the build.prop File:
- Download the desired ROM and firmware for your device, and extract the build.prop file from the system image.
- Download and Extract Android SDK Platform Tools:
- Download Android SDK Platform Tools on your PC and extract the contents to a convenient location.
- Download Pixel Flasher:
- Launch Pixel Flasher:
- Open Pixel Flasher on your PC and scan for your device.
- Select your device from the list.
- Click Magisk:
- In Pixel Flasher, choose the option to install Magisk. This will automatically patch the boot image with Magisk.
- Process the build.prop:
- Pixel Flasher may prompt you to provide the build.prop file. Point it to the extracted build.prop file from the ROM+firmware.
- Copy the JSON File Contents:
- After processing the build.prop, Pixel Flasher may generate a JSON file. Copy the contents of this JSON file.
- Edit the pif.json File on Your Phone:
- Transfer the copied JSON contents to your phone and edit the
pif.jsonfile using a text editor on your device. Follow any instructions provided by Pixel Flasher for this step.
- Transfer the copied JSON contents to your phone and edit the
- Download and Install Play Integrity API Checker:
- Go to the Play Store on your device and download “Play Integrity API Checker.”
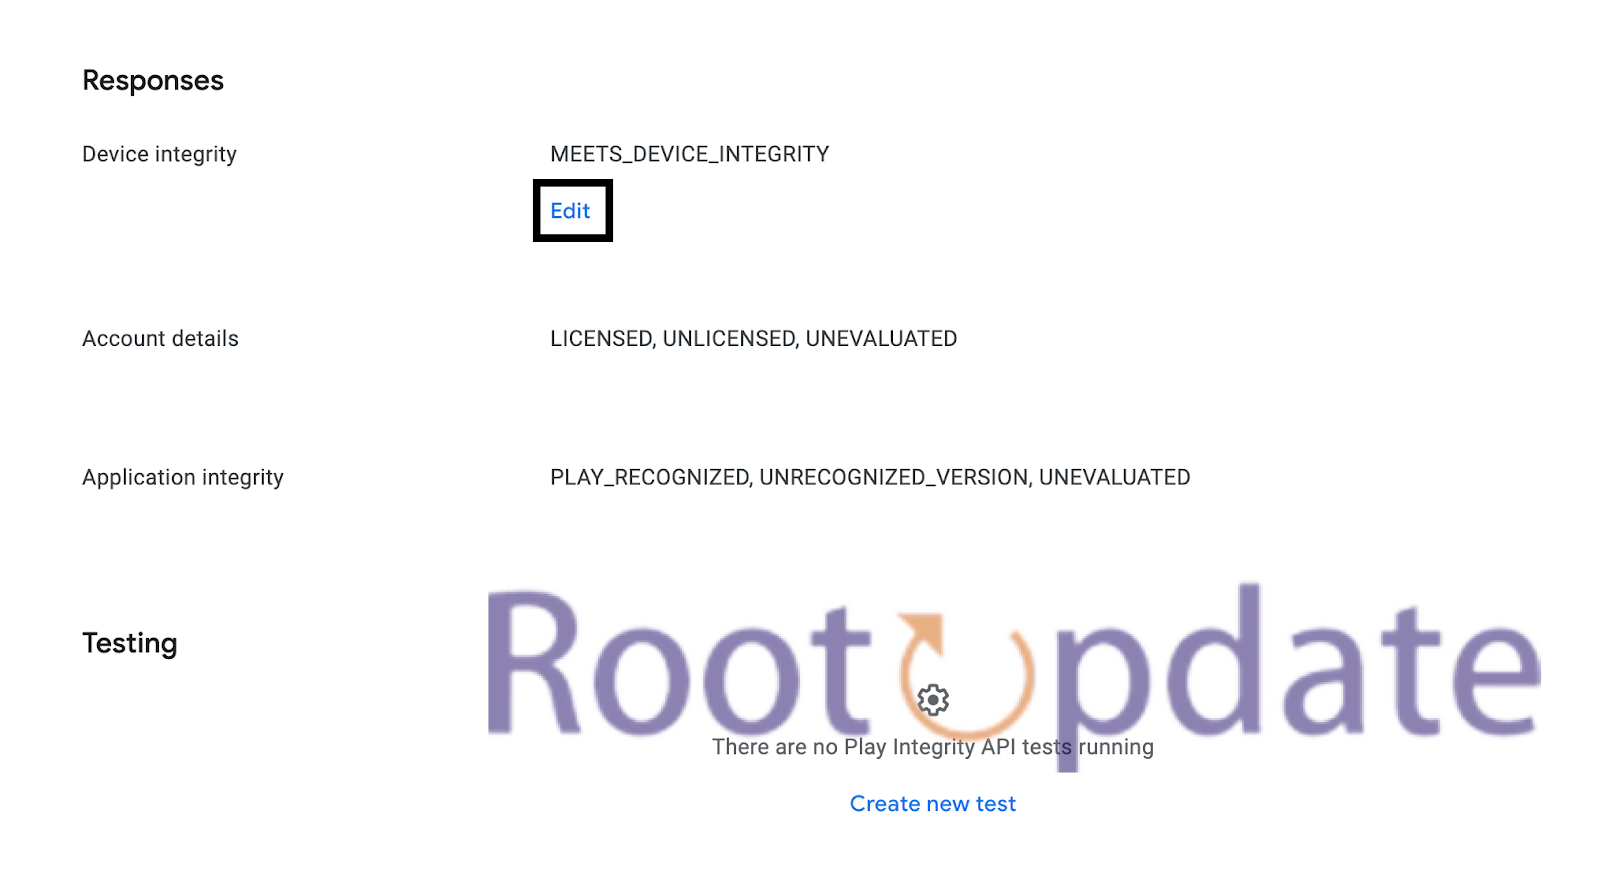
- Check Play Integrity Test:
- Open Play Integrity API Checker and run the test to check if your device passes the Play Integrity test.
Changing the build.prop file, adding Magisk, and checking Play Integrity are all made easier by this automated way. But you should always be careful and make sure you know what these acts will mean. Also, make sure you have copies of important files before you make any changes to the server itself.
Manual Method [Difficult]
The manual way gives people who want to learn by doing a better understanding of the process. Follow these steps:
- Download the Stock ROM:
- Obtain the stock ROM for your compatible device, ensuring it meets the required criteria. You may find official ROMs on the manufacturer’s website or trusted third-party sources.
- Extract the ROM:
- Extract the downloaded ROM to obtain the system, product, and vendor build.prop files.
- Copy Essential Values:
- Open the build.prop files and copy the values of the following keys:
PRODUCT,DEVICE,MANUFACTURER,BRAND,MODEL, andFINGERPRINT.
- Open the build.prop files and copy the values of the following keys:
- Paste Values into Custom .json Template:
- Create a custom.pif.json template file and paste the copied values into their corresponding fields. Ensure the format aligns with the requirements of the Play Integrity API Checker.
- Copy .json File to Magisk Module Directory:
- Transfer the created custom.pif.json file to the
/data/adb/modules/playintegrityfix/directory on your device.
- Transfer the created custom.pif.json file to the
- Flash .json File via Magisk:
- Open Magisk Manager on your device.
- Install or flash the custom.pif.json file as a Magisk module. This process may vary depending on the Magisk Manager version.
- Reboot Your Device:
- Reboot your device to apply the changes.
- Check Play Integrity Test:
- Download and install Play Integrity API Checker from the Play Store.
- Run the test to check if your device passes the Play Integrity test.
For a more hands-on experience, this manual way lets you change the needed values directly and add them to the Play Integrity API Checker.
Rooting and Custom ROMs: A Difficult Yet Achievable Journey Ahead!
To get through the problems that the Play Integrity Test brings up, you need to be able to combine new ideas with the ability to change. Because of Google’s constant “cat and mouse” game, people need to look into different ways to keep access to rooted devices and custom ROMs.
Related:
Conclusion
As technology gets better, tech fans have to deal with more difficult problems. It’s not easy to pass the Play Integrity Test, but you can do it with the right tools and strategies. Pick the way that works best for you and your skills, but keep in mind that Google’s constant updates may mean you need to make changes. Keep yourself up to date, be flexible, and keep enjoying the benefits of rooted devices and custom ROMs.