Fix: Power Troubleshooter Missing In Windows 11: Are you experiencing power troubles on your Windows 11? Frustrating, isn’t it? Well, worry no more because we’ve got the fix for you! In this blog post, we’ll tackle the common issue of “Power Troubleshooter Missing in Windows 11” head-on and provide you with some practical solutions to get your power options up and running again. So grab a cup of coffee (or tea) and let’s dive right in!
What Causes the “There Are Currently No Power Options Available” Error?
Table of Contents

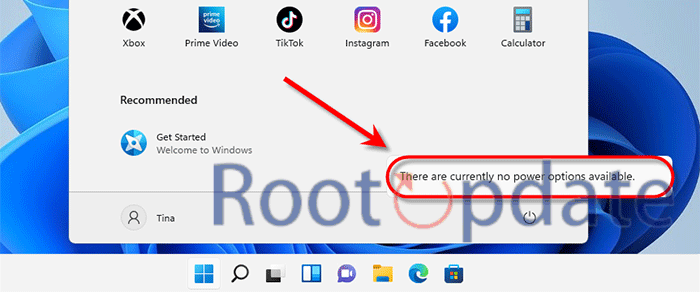
The dreaded error message “There Are Currently No Power Options Available” can be quite perplexing, leaving users scratching their heads in frustration. But fear not, as we’re here to shed some light on what could be causing this pesky issue.
- User Account Restrictions: If a user is logged into a Standard user account rather than an Administrator account, they might not have the necessary permissions to view or change power options.
- Corrupted System Files: Occasionally, essential system files related to power management might get corrupted, leading to the error.
- Group Policy Restrictions: Sometimes, IT administrators in a workplace might set up Group Policy restrictions, preventing users from accessing or modifying power options.
- Driver Issues: Outdated or incompatible hardware drivers, especially those related to power management or graphics, might cause this error.
Fix: Power Troubleshooter Missing In Windows 11

Windows 11 includes a host of troubleshooters that are meant to detect and address common issues. The Power Troubleshooter stands out among them. It investigates and corrects inconsistencies in power management and behavior. Imagine confronting power-related issues only to realize that the troubleshooter you rely on is not present. Follow these simple steps given below to fix this issue:
FIX 1: Use Power Troubleshooter via CMD
One of the first steps you can take to fix the “There Are Currently No Power Options Available” error in Windows 11 is to use the Power Troubleshooter via CMD. The Command Prompt, or CMD, is a powerful tool that allows you to execute various commands and troubleshoot issues on your computer.
1. As an administrator, open the Command Prompt.
2. Type’msdt.exe /id PowerDiagnostic’ and press Enter.
‘msdt.exe /
3. Turn on your computer again to see what happens.
Remember, it’s always important to follow instructions carefully when using any troubleshooting methods on your computer.
FIX 2: Restore Power Troubleshooter to Default
If the power troubleshooter is missing or not working properly on your Windows 11, you can try restoring it to its default settings. This may help resolve any issues and bring back the functionality of the troubleshooter.
To restore the power troubleshooter to default, follow these steps:
1. Press the Windows key + R on your keyboard to open the Run dialog box.
2. Type “cmd” and press Enter to open the Command Prompt.
3. In the Command Prompt window, type below given command and press enter.
powercfg -restoredefaultschemes
4. The power troubleshooter will now open and attempt to diagnose any power-related problems on your system.
By restoring the power troubleshooter to its default settings, you give it a fresh start and increase your chances of resolving any issues that may have been causing it to go missing or malfunctioning in Windows 11.
Remember that this fix may not work for everyone, as each system configuration is unique. If this method doesn’t solve your problem, don’t worry – there are other fixes you can try!
FIX 3: Use SFC and DISM Scans
If you’re still struggling with the “There Are Currently No Power Options Available” error in Windows 11, don’t worry. There’s another fix that you can try – using System File Checker (SFC) and Deployment Image Servicing and Management (DISM) scans.
These built-in tools are designed to scan your system files for any corruption or issues that may be causing the power troubleshooter to go missing. Here’s how you can use them:
- Open Command Prompt as Administrator:
- Right-click on the Start menu.
- Select “Command Prompt (Admin)”.
- Run the SFC Scan:
- In the command prompt window, type sfc /scannow and press Enter.
- This initiates a scan of system files and repairs corrupted ones it identifies.
- Run the DISM Scan:
- Once the SFC scan is complete, type DISM /Online /Cleanup-Image /RestoreHealth and press Enter.
- This checks for issues in the Windows image file.
- Restart the Computer:
- Wait for both scans to finish.
- Reboot your computer.
Note: These scans can be crucial for addressing underlying system file concerns affecting the power troubleshooter in Windows 11.
FIX 4: Using Control Panel
The Control Panel is a powerful tool in Windows that allows you to manage various system settings and configurations. If you’re facing the issue of the Power Troubleshooter missing in Windows 11, using the Control Panel may help resolve it.
- Access the Control Panel:
- Search for “Control Panel” in the Start menu.
- Alternatively, right-click on the Start button and select “Control Panel” from the context menu.
- Navigate to Power Options:
- Go to Control Panel > Hardware and Sound > Power Options.
- Click on “Troubleshoot common computer problems.”
- Use the Power Troubleshooter:
- In the troubleshooting section, search for “Power” or related terms concerning power management.
- Click on the relevant troubleshooter.
- Follow any prompts or instructions given by the troubleshooter.
- Outcome:
- The Power troubleshooter will check for issues linked to power settings and try to resolve them automatically.
- If effective, the Power Troubleshooter functionality should be restored.
Note: The Control Panel method is just one possible solution. If it doesn’t resolve the problem, consider exploring other fixes mentioned in related articles or guides. Always experiment with different solutions until you find the one suitable for your issue.
FIX 5: Using Registry Editor Tweak
If the Power Troubleshooter is missing in Windows 11, you can try using a registry editor tweak to fix the issue. Before making any changes to your registry, it’s important to create a backup just in case anything goes wrong.
- Access the Run Dialog Box:
- Press Win + R on your keyboard.
- Open the Registry Editor:
- Type regedit in the Run dialog box.
- Press Enter or click OK.
- Navigate to the Desired Registry Path:
- Follow this path: HKEY_CURRENT_USER\Software\Policies\Microsoft\Windows
- Create or Locate the “System” Key:
- If you don’t see a “System” key under “Windows”:
- Right-click on “Windows”.
- Select New -> Key.
- Name this new key as “System”.
- If you don’t see a “System” key under “Windows”:
- Create or Locate the “Power” Entry:
- With the “System” key selected:
- If you don’t see an entry named “Power”:
- Right-click on “System”.
- Choose New -> DWORD (32-bit) Value.
- Name this value as “Power”.
- If you don’t see an entry named “Power”:
- With the “System” key selected:
- Modify the “Power” Entry:
- Double-click on the “Power” entry.
- Set its value data to 0.
- Close and Restart:
- Close the Registry Editor.
- Restart your computer for the changes to take effect.
⚠️ Caution: Editing the registry is a sensitive operation. Any mistake can cause system instability. Always backup your registry before making changes and proceed with caution. If unsure, consider seeking assistance or further information on the specific changes you’re making.
FIX 6: Using Group Policy Editor
The Group Policy Editor is a powerful tool in Windows that allows users to modify and control various settings on their system. If you’re facing the issue of the Power Troubleshooter missing in Windows 11, using the Group Policy Editor might be just the fix you need.
- Open the Run Dialog Box:
- Press Win + R on your keyboard.
- Launch the Group Policy Editor:
- Type gpedit.msc in the Run dialog box.
- Press Enter or click OK.
- Navigate to the Required Policy Path:
- Go to Computer Configuration > Administrative Templates > System > Troubleshooting and Diagnostics > Windows Components > Maintenance Diagnostics.
- Modify the “Power Diagnostic” Entry:
- On the right-hand side, find the entry named “Power Diagnostic”.
- Double-click on it to access its properties.
- Ensure that the “State” is set to either “Not Configured” or “Enabled”.
- If it’s set to “Disabled”, switch it to one of the aforementioned options.
- Apply and Restart:
- Click Apply and then OK.
- Close the Group Policy Editor.
- Restart your computer for the changes to be effective.
With these steps, you should ideally restore access to the Power Troubleshooter in Windows 11. The Group Policy Editor provides a granular approach to managing various system functionalities, making it an effective tool for troubleshooting.
FIX 7: Try a Clean Boot
If you’re still facing the issue of the Power Troubleshooter missing in Windows 11, another solution you can try is performing a clean boot. This helps to identify if any third-party applications or services are causing conflicts with your system’s power options.
- Open the Run Dialog Box:
- Press Windows key + R.
- Access the System Configuration Window:
- Type msconfig and press Enter.
- Modify Startup Selection:
- Go to the General tab.
- Choose Selective startup.
- Uncheck both options beneath it.
- Configure Services:
- Switch to the Services tab.
- Tick the box for Hide all Microsoft services.
- Click Disable all.
- Adjust Startup Items:
- Move to the Startup tab.
- Click Open Task Manager.
- In Task Manager, disable all startup items:
- Right-click on each item.
- Choose Disable.
- Close Task Manager.
- Apply Changes and Restart:
- Return to the System Configuration window.
- Click Apply, then OK.
- Restart your computer.
With your system in a clean boot state, determine if the Power Troubleshooter in Windows 11 is accessible. This process limits third-party services from starting up, which can help identify conflicts.
⚠️ Caution: Clean booting deactivates some services vital for specific software or PC features. If problems arise, revert to the normal startup by using the same procedure but opting for Normal startup.
By performing a clean boot, you can eliminate potential software conflicts that may be causing issues with your power options in Windows 11
FIX 8: Perform a System Restore
If you’ve tried all the previous fixes and still can’t find the Power Troubleshooter in Windows 11, performing a system restore might be your last resort. This option allows you to revert your computer back to an earlier state when everything was working fine.
- Open the Run Dialog Box:
- Press Windows key + R.
- Access the System Restore Utility:
- Type rstrui (without quotes) and hit Enter.
- Initiate the Restore Process:
- In the System Restore window, click Next.
- Choose a Restore Point:
- Pick a restore point from the provided list, ideally one dated before the power troubleshooter problem began.
- Initiate the Restoration:
- Click Next.
- Review your choice and click Finish to begin the restore process.
⚠️ Things to Consider:
- System Restore will revert settings and software changes made after the selected restore point’s date.
- Any recently installed software or updates may be removed, while older software or updates could be restored.
- This procedure won’t affect personal files like photos, documents, or emails.
- Use System Restore as a last resort. While it can be effective, it might not always resolve specific issues.
- Ensure you have backup of any important data before proceeding.
Remember, although System Restore is a powerful tool, it may not always address issues specific to the Power Troubleshooter missing in Windows 11. If problems persist after the restoration, you may need to consider other troubleshooting methods or seek expert assistance.
Related:
Conclusion
In this article, we discussed the issue of the Power Troubleshooter missing in Windows 11 and provided several fixes to resolve it. Whether you prefer using Command Prompt, Control Panel, Registry Editor, Group Policy Editor, or performing system scans with SFC and DISM, there is a solution for you.
Remember that troubleshooting power-related issues can be complex at times, but with these methods at your disposal, you should be able to restore the Power Troubleshooter functionality on your Windows 11 device.
If none of the above fixes worked for you or if you’re uncomfortable making changes to your system settings without professional guidance, it may be best to seek assistance from a qualified technician or contact Microsoft Support directly.
We hope that this guide has helped you overcome the “There are currently no power options available” error in Windows 11. Stay tuned for more helpful tips and troubleshooting guides for various Windows issues!